


How to Make a Blanket Stitch?
A blanket stitch is a simple yet beautiful embroidery technique used to secure the edges of fabric while adding a decorative touch. Whether you’re finishing a cozy fleece blanket, reinforcing the edge of felt crafts, or embellishing handmade projects, this stitch is both practical and stylish. Its looping design prevents fraying, making it a favorite among sewing enthusiasts. So, how do you make a blanket stitch?
Start by threading a needle and knotting the end of the thread. Insert the needle from the back of the fabric, pull it through, and loop the thread under the needle before tightening. Repeat along the edge, keeping stitches evenly spaced for a neat finish.
Now, let’s dive into the full step-by-step guide!
How to Make a Blanket Stitch: Step-by-Step Guide
A blanket stitch is a fantastic way to give your fabric edges a neat and decorative finish. Whether you're working on a handmade quilt, felt crafts, or hemming a cozy throw, this simple technique adds charm and durability. With just a needle, thread, and a little patience, you can create a beautiful stitch that prevents fraying and enhances your project. Here’s the step-by-step guide to mastering this timeless stitch:
Required Materials:
- Needle
- Thread
- Fabric or item you want to stitch
Step 1: Gather Your Materials
Before you begin, ensure you have all the necessary supplies. You’ll need a needle, a thread that complements or contrasts with your fabric, and the fabric itself. The type of thread you choose can impact the final look—thicker thread adds a bold touch, while finer thread creates a delicate effect. A good workspace with ample lighting will also make stitching easier.
Step 2: Thread Your Needle and Secure It
Start by threading your needle with enough length to complete your stitching without needing to rethread. Knot the end of the thread to keep it from slipping through the fabric. If you want a secure start, you can make a double knot or take a tiny backstitch to lock the thread in place. Choosing the right thread length is essential to avoid tangles while sewing.
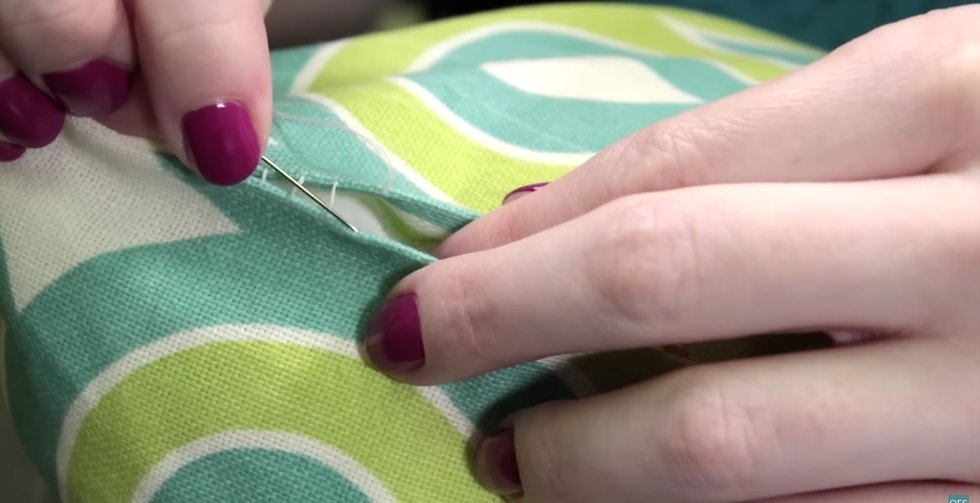
Step 3: Make the First Stitch
Insert the needle from the back of the fabric to the front at your desired starting point. Pull the thread through until the knot stops it from moving. Then, insert the needle back through the fabric just a small distance to the side, leaving a loop on the surface. This loop will be essential for creating the edge stitch.
Step 4: Form the Blanket Stitch
To create the classic blanket stitch, bring the needle up through the fabric a short distance away from the last entry point, making sure it passes over the loop. Pull the thread gently to form an even, secure stitch. Repeat this motion along the fabric edge, keeping each stitch evenly spaced for a neat finish. If you're working on a decorative blanket edge, this stitch pairs well with soft, high-quality fabric—consider exploring options when you buy blanket online to find the perfect match for your project.
Step 5: Maintain Consistency While Stitching
Consistency is key to achieving a polished look. Ensure each stitch is evenly spaced and maintains a uniform height along the edge of the fabric. If you notice uneven stitches, adjust by slightly tightening or loosening the thread. Taking your time with this process will give your project a refined and professional appearance.
Step 6: Secure the Final Stitch
When you reach the end of your stitching line, it’s time to secure the thread. Insert the needle through the last loop to create a small knot that prevents the stitches from unraveling. You can also weave the thread through a few previous stitches on the backside before trimming it off. This ensures a strong and lasting finish.
Common Mistakes to Avoid While Stitching
Even the simplest stitches can go wrong without proper technique and attention to detail. A few small mistakes can make your stitches look uneven or cause the fabric to fray. To help you achieve clean, professional-looking results, here are some common stitching errors and how to avoid them.
- Using the Wrong Thread Length: A thread that’s too long tangles easily, making the stitching process frustrating and messy. On the other hand, a thread that’s too short requires frequent rethreading, disrupting your flow.
- Inconsistent Stitch Spacing: Uneven stitches can make your project look unpolished and messy. Keeping a consistent distance between stitches helps create a neat and uniform finish.
- Pulling the Thread Too Tight: Over-tightened stitches can cause the fabric to pucker, making your work look distorted. Loosening the thread slightly will keep the stitches even and smooth.
- Not Securing the Knot Properly: A weak knot at the beginning or end can cause your stitches to unravel. Double-knotting or weaving the thread through previous stitches helps keep it secure.
- Skipping the Fabric Edge Alignment: Stitching too far from the fabric’s edge reduces durability, while stitching too close increases the risk of fraying. Positioning your stitches correctly ensures a sturdy and long-lasting finish.
- Ignoring Thread Tension Consistency: Uneven tension can make some stitches look loose while others appear too tight. Maintaining steady tension throughout prevents distortion and keeps the stitch pattern uniform.
Creative Ways to Use the Blanket Stitch
The blanket stitch isn’t just for finishing fabric edges—it’s a versatile technique that adds charm and durability to various projects. From decorative accents to functional reinforcements, this stitch offers endless possibilities. Whether you're a beginner or an experienced crafter, you can use it to enhance handmade creations. Here are five unique ways to incorporate the blanket stitch into your sewing projects.

Embellishing Handmade Quilts
A blanket stitch can add a decorative border to quilts, giving them a personal and handmade touch. It works beautifully around applique pieces, securing them to the quilt while creating a stylish finish. Choosing a contrasting thread color enhances the details, making each stitch stand out. This technique helps blend traditional and modern quilting styles seamlessly.
Reinforcing Felt Crafts
Felt is a popular material for DIY crafts, and the blanket stitch is perfect for reinforcing its edges. It keeps fabric layers securely attached while adding a clean, polished look to handmade decorations. Whether you're creating stuffed ornaments, keychains, or toys, this stitch ensures durability. Neatly stitched edges make any felt project look professionally made.
Personalizing Clothing and Accessories
Adding a blanket stitch to clothing and accessories can transform ordinary pieces into something unique. It works well on cuffs, pockets, and even scarf edges for a decorative effect. When applied to fabric patches, it gives a stylish, handmade aesthetic that stands out. This is a great way to upcycle old clothes and refresh your wardrobe.
Repairing and Reinventing Blankets
Blanket stitch is ideal for fixing frayed edges or reinforcing worn-out spots on your favorite blankets. It provides a strong, flexible hold while adding a decorative touch that blends with the fabric. If you're wondering about washing heavy blankets, consider using this stitch to reinforce edges before laundering to prevent further fraying. A well-stitched border can help extend the life of your coziest blankets.
Creating Decorative Home Décor
From table runners to pillow covers, the blanket stitch can advance home décor projects with its handcrafted charm. It works well on fabric coasters, placemats, and wall hangings, adding a touch of personality. Using multi-colored thread enhances the visual appeal, making each stitch a part of the design. Handmade home décor stitched with care adds warmth to any space.
Why Learn the Blanket Stitch?
The blanket stitch is more than just a decorative technique—it’s a practical skill that can improve your sewing projects. Whether you're a beginner or an experienced crafter, mastering this stitch offers many benefits. Here are some great reasons to add the blanket stitch to your skill set.
- Enhances Fabric Durability: A well-stitched edge prevents fraying and extends the lifespan of the fabric. Strong stitches reinforce seams, making handmade projects last much longer.
- Adds a Decorative Touch: This stitch brings a charming, handcrafted feel to blankets, clothes, and home décor. Choosing colorful thread makes each project visually unique.
- Perfect for Hand-Sewing Projects: No sewing machine? No problem! The blanket stitch allows you to create professional-looking finishes entirely by hand.
- Great for Repairing Fabrics: Frayed edges and small tears can be fixed easily using this stitch. It helps restore worn-out items without needing complex techniques.
- Boosts Creativity and Customization: Using this stitch lets you experiment with different designs, patterns, and color combinations. Handmade details make every project feel truly personal.
Tips for Perfecting Your Blanket Stitch
Mastering the blanket stitch takes practice, but small adjustments can make a big difference in your results. Whether you're working on fabric edges, decorative projects, or repairs, precision matters. Keeping your stitches even and secure will improve the overall look of your work. Here are some practical tips to help you perfect your blanket stitch.

Maintain Even Stitch Spacing
Uneven stitches can make your project look untidy and inconsistent. Using a ruler or marking tool helps keep your spacing uniform. Practicing on scrap fabric can improve your precision before working on the final piece. Neatly spaced stitches create a polished and professional finish.
Use the Right Thread Tension
Pulling the thread too tight can make the fabric pucker, affecting the stitch’s appearance. Keeping the tension too loose can cause gaps, making the stitch less secure. Finding the right balance ensures smooth and durable stitches. A steady hand helps maintain consistency throughout your project.
Choose the Best Needle and Thread
The right needle size makes stitching easier and prevents fabric damage. Thicker threads add a bold decorative touch to a blanket, while thinner threads create a delicate look on a throw. Selecting materials based on fabric type enhances both durability and design. Understanding the difference between a throw and a blanket can help when picking the right fabric for your project.
Secure the Beginning and End Properly
A weak starting knot can cause stitches to unravel over time. Double-knotting the thread or weaving it into previous stitches adds strength. Finishing with a secure knot prevents loose threads from undoing your work. A strong start and finish ensure a lasting stitch.
Practice on Different Fabrics
Some fabrics, like fleece and felt, are easier to stitch than others. Experimenting with different textures helps build confidence and control. Practicing on a variety of materials improves adaptability in handling different projects. Mastering stitches on different fabrics expands creative possibilities.
Frequently Asked Questions About Blanket Stitching
Learning the blanket stitch can be easy and fun, but beginners often have questions about techniques and materials. Whether you're working on fabric edges, decorative crafts, or repairs, getting the details right matters. Here are ten frequently asked questions with clear answers.
What Type of Thread Works Best for a Blanket Stitch?
Embroidery floss, pearl cotton, or strong polyester thread are great choices for a blanket stitch. A thicker thread creates a bold, decorative effect, while a thinner thread provides a delicate touch. Choose a thread that complements or contrasts your fabric for added style.
Can You Use a Blanket Stitch on Stretchy Fabrics?
Yes, but extra care is needed when working with stretchy fabrics like jersey or fleece. Use a slightly looser tension to prevent the fabric from gathering. A stabilizer or interfacing helps maintain even stitches and prevents unwanted stretching while sewing.
How Do You Keep Blanket Stitches Even?
Marking stitch points with a fabric pencil or using a ruler helps maintain consistency. Practicing on scrap fabric before stitching on the final project also improves precision. Keeping a steady rhythm and maintaining uniform thread tension ensures neat, even stitches.
Is the Blanket Stitch Suitable for Sewing Seams?
While primarily a decorative edge stitch, it can reinforce seams on soft materials like felt. It works well for joining fabric pieces in crafting projects. However, for heavy-use items, a stronger stitch like backstitch or whipstitch is recommended.
How Can You Use a Blanket Stitch for Appliqué?
A blanket stitch secures fabric appliqué pieces onto a base fabric while adding a decorative border. Choose a thread color that blends or contrasts for different effects. Even spacing and smooth curves enhance the overall look of the stitched design.
What Is the Best Needle Size for a Blanket Stitch?
The best needle size depends on the fabric and thread thickness. A larger needle works well for thicker threads and dense fabric, while a finer needle is best for lightweight materials. Testing different sizes helps find the most comfortable option.
Can You Make a Blanket Stitch on Leather?
Yes, but a specialized leather needle is necessary to pierce the tough material. Pre-punching holes with an awl helps make stitching easier and more even. A waxed thread provides durability and a clean, professional finish on leather projects.
How Do You Fix Mistakes in a Blanket Stitch?
If a stitch is too loose or uneven, carefully remove it using a seam ripper. Redo the stitch by following the previous spacing to maintain consistency. Practicing proper tension control prevents errors and ensures a polished final result.
What Are Some Creative Variations of the Blanket Stitch?
Variations include the closed blanket stitch for a denser look, a scalloped version for a decorative touch, and a double-layered effect for extra durability. Experimenting with different thread colors and stitch heights adds a unique design element to projects.
Can You Use a Blanket Stitch to Attach a Lining?
A blanket stitch isn’t the best choice for linings that require a hidden seam, but it works for decorative finishes. Attaching a lining with small, even stitches provides a charming, handmade effect. A whipstitch or slipstitch may offer a cleaner look.
Bottom Lines
Mastering the blanket stitch opens up endless possibilities for both functional and decorative sewing projects. From reinforcing fabric edges to adding a unique handmade touch, this technique is simple yet highly effective.
Whether you're a beginner or an experienced crafter, learning how to make a blanket stitch ensures that your projects are both durable and visually appealing. With the right materials, proper spacing, and steady tension, you can create stitches that look clean and professional.
Keep practicing, experimenting with different fabrics, and soon you’ll be stitching effortlessly. Embrace this timeless technique and add a beautiful, handcrafted touch to every project!


